


A pearl may appear exquisite in a jewellery box, yet its true lustre only reveals itself in the right light. With two simple light checks you can assess how deeply a pearl reflects light and whether its nacre lends genuine depth rather than a mere surface sheen.
This guide explains how a pearl's nacre and surface condition create its lustre, how to prepare the pearl and control the viewing conditions, and then guides you through quick tests in natural daylight and warm indoor light. Follow the checks and practical interpretation tips to recognise true sparkle, spot potential issues, and decide whether to clean, seek an appraisal, or wear the pearl with confidence.

How lustre and nacre create a pearl's natural glow
Lustre arises from two interacting effects: bright surface reflection from a smooth outer layer, and interference and scattering by many closely packed nacre platelets that create a deep inner glow with subtle overtones. An annotated diagram can separate the fine, mirror-like highlight of surface reflection from the softer, layered depth produced by internal scattering. High lustre appears as a small, bright, well-defined reflection with clear mirroring of nearby shapes, while low lustre shows as a broad, dull, indistinct patch. Seeing the surface sheen and the inner glow together helps you judge whether a pearl’s appearance stems from a substantial nacre build-up rather than merely a polished outer film.
To perform a point-source check, gently wipe the pearl with a soft, lint-free cloth and place it on a neutral white card. Shine a small, focused light or a mobile phone torch from a short distance and rotate the pearl. High lustre presents as a tiny, bright, well defined reflection with clear mirroring of nearby shapes; low lustre appears as a broad, dull patch. For a diffuse-light check, view the pearl under soft, even illumination such as cloudy daylight or a diffused lamp. Turn the pearl slowly and watch for a sustained inner glow and shifting colour layers, which suggest thicker nacre. Pearls with thin nacre tend to look flat and chalky. Use a 10x loupe to determine whether highlights originate at the surface or within the layers. Compare several pearls to calibrate your eye, and keep light distance and background consistent. These home checks are useful for assessing relative lustre and nacre behaviour, but they cannot precisely measure nacre thickness or confirm a pearl's origin. For definitive grading, consult a professional.
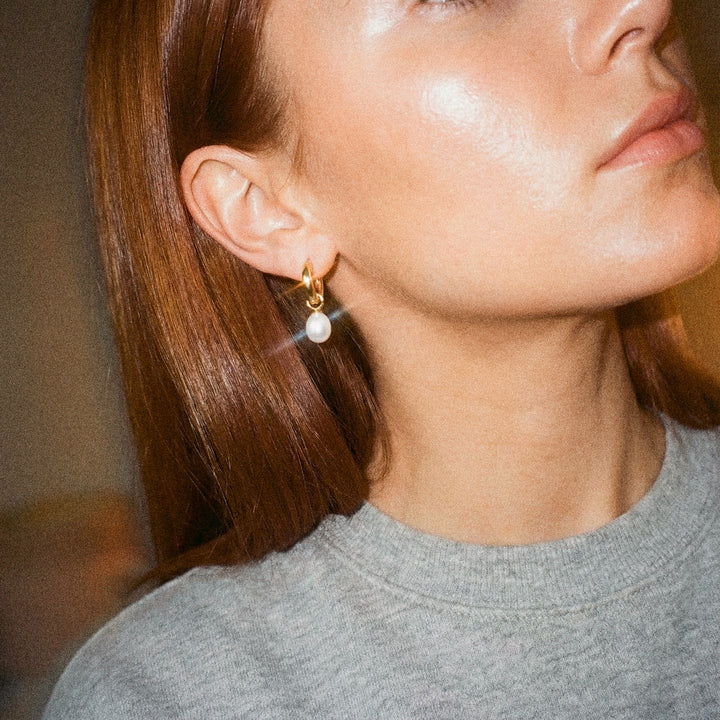
Wear three genuine pearls to compare lustre.

How to prepare pearls and optimise viewing conditions
Start by preparing to handle and clean the pearl. Wash your hands thoroughly or wear lint-free gloves, then gently wipe the surface with a soft microfibre cloth lightly dampened with a little gentle soap and water. Pat dry to remove oils and cosmetics that can scatter light. Work beneath a single, neutral light source or in indirect daylight, and reduce glare with a diffuser or a sheet of white paper to keep colour consistent and enable repeatable comparisons. Set the pearl against white, mid-grey and black backgrounds to observe how each affects the highlights and undertone; this helps separate surface reflections from the pearl's body colour.
Hold the pearl at eye level and tilt it slowly, noting the size, shape and crispness of the specular highlight. A small, sharp highlight that preserves a reflected image under a point light is a sign of strong, mirror-like lustre; a broad, diffuse highlight suggests weaker surface reflection. Watch how the highlight moves as you rotate the pearl to discern whether the glow comes from the surface or from deeper nacre layers. Clear away nearby shiny objects and place the pearl on a non-reflective pad to prevent distracting reflections that can mimic genuine lustre. Finish with a loupe or hand magnifier to inspect micro-scratches, pits and edge definition, since these close-up details explain why a pearl may appear bright or chalky at normal viewing distance.
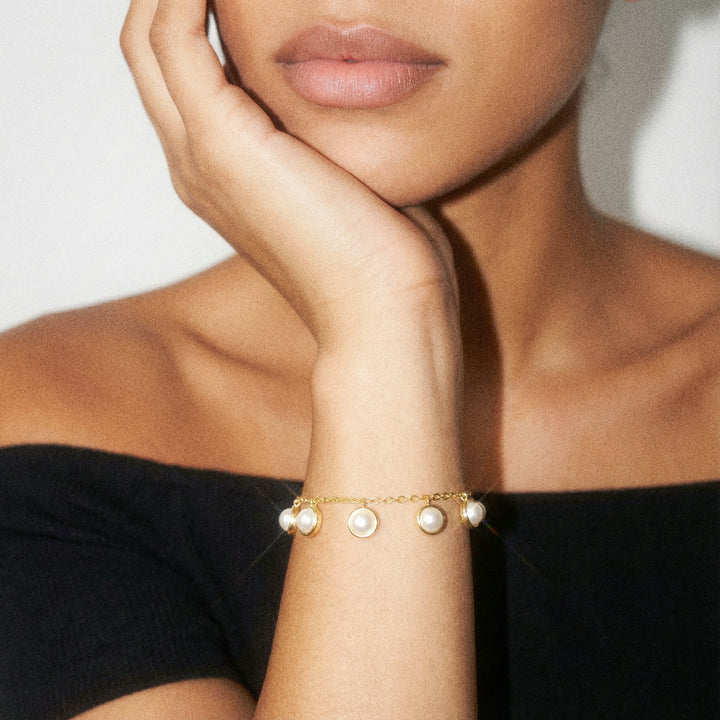
Showcase your pearl's lustre with bezel-set styling

How to assess pearl sparkle in natural daylight
Examine a pearl in open shade beside a window, gently tilting it as you watch the highlights shift. Pearls with strong lustre throw crisp, mirror-like reflections as the angle changes, while those with weaker lustre scatter light into a soft, diffused glow. Hold a plain white card behind the pearl to neutralise background colour, reveal subtle overtones and make any chalky areas more apparent. Rotate the pearl and look for defined reflections of nearby shapes, such as a window frame or phone screen. Crisp, high-contrast reflections indicate thicker, well formed nacre layers, whereas blurred or fuzzy reflections can suggest thinner nacre or a surface treatment.
Place several pearls side by side on a clean white background and view them in the same, even light to judge consistency of brightness, colour and contrast. Uneven sparkle along a strand can indicate variation in nacre quality or signs of wear. Photograph the pearls close up in natural light and examine the images on a larger screen, where subtle differences in highlight definition and surface blemishes are easier to spot. If you have a loupe, use it to inspect highlights and surface texture for added detail.
Showcase high-lustre pearls with a minimalist, gold-accented stud.

How to evaluate a pearl's sparkle in warm indoor lighting
Gently wipe the pearl with a lint-free cloth lightly dampened with water before testing, as oils and residues can soften highlights and lead you to underestimate the lustre. Place the pearl at eye level beneath a warm, yellow indoor lamp and tilt it slowly. Sharp, pinpoint highlights set against a clear internal glow indicate strong lustre and thicker nacre; soft, fuzzy reflections point to weaker lustre or surface wear. Inspect from several angles and distances. Sparkle that remains crisp as you change viewpoint shows good orient and surface reflectivity, whereas reflections that blur or disappear with small angle changes suggest surface irregularities or thinner nacre.
Place the pearl on a piece of black cloth and on a white card to reveal different characteristics. The black background emphasises surface shine and contrast, while the white card brings out overtones and subtle shifts in colour. Photograph the pearl using a single lamp as the sole light source, with room lighting dimmed; avoid direct camera flash so the image captures how highlights concentrate. Maintain consistent camera settings and distance to produce reliable side-by-side comparisons. Examine the images at full size to identify small areas of wear, cloudy patches or faint colour shifts that can be difficult to discern with the naked eye.
Try a warm gold drop showcasing premium freshwater lustre.

Interpreting observations to plan your next steps with confidence
Perform two simple light tests to assess a pearl's lustre. First, use a diffuse light to judge the overall glow. Then use a small point source to examine how sharply the surface reflects light. If you can read printed text in the pearl's reflection or see a crisp pinpoint of light, that typically indicates strong lustre and healthy nacre. By contrast, a soft, milky sheen with no clear reflection may signal low lustre, surface residue or a coating. Also look for bright, well defined edges around the bead and subtle colour shifts or flashes, which are signs of orient and layered nacre. Photograph the pearl under both lighting setups with a piece of printed text or a plain ruler in the frame, and note whether you cleaned the pearl before testing to create a reliable visual record.
If tests show a muted or patchy sheen, clean gently with warm water and a soft cloth, then repeat the checks and compare photographs side by side. Use a loupe at 10x magnification to inspect for pits, concentric growth lines, surface bubbles or flaking around the drill hole, and gently run a fingertip around the hole edge to detect any layered coatings. Persistent blurring after cleaning usually indicates surface irregularity or an applied coating rather than dirt, which should prompt non-invasive expert testing such as further magnified inspection or radiography to check for a bead nucleus or treatments. Avoid abrasive cleaners and DIY chemical tests that could damage the surface, and keep clear photographs and written notes of observations, cleaning steps and any expert reports to support future conservation, insurance or resale decisions.
Two simple light checks, carried out after a gentle clean, can reveal whether a pearl's lustre arises from layered nacre or from surface reflection. Mirror-sharp pinpoint highlights and crisp reflections point to thick, layered nacre, while broader, softer patches that remain after cleaning suggest thin nacre, surface wear or an applied coating.
Examine pearls methodically. Prepare a controlled viewing area and compare pieces in soft, diffuse daylight and beneath a single point light. Record your observations with consistent photographs and notes. If reflections remain crisp and a steady inner glow is visible, the pearl can be worn or stored with confidence. If reflections appear blurred or the surface looks patchy, arrange a non-invasive assessment with a specialist to confirm the condition of the nacre.