


Pearls can look similar at a glance while their type, origin, nacre thickness, surface quality, treatments, and mounting differ significantly. Those hidden differences influence appearance, durability, and care requirements, so you cannot rely on looks alone when deciding what to buy.
This guide shows how to identify pearl type and origin, assess lustre, nacre, surface, and shape, and confirm authenticity and certification. It also explains how to inspect settings and materials for durability, and how to verify seller credibility, protections, and post-purchase support so you can buy pearls with confidence.

Image by khezez | خزاز on Pexels
Identify pearl type and origin
Begin with a careful visual and tactile inspection under bright, diffuse light and a 10x loupe to judge lustre, surface blemishes, shape, and overtone. A sharp, mirror-like reflection and fine concentric growth lines under magnification usually indicate thick, natural nacre, while a dull, chalky surface or uniform sheen can signal heavy treatment or imitation. Use size, colour, and typical shapes as preliminary clues to species and growing environment, and ask the seller to state the cultivation method, farm, or region to corroborate appearance. Treat these observations as indicators to guide further testing rather than definitive proof.
Request an X-ray or radiograph and a nacre thickness measurement from an independent gemmological laboratory, because a clear round core on X-ray identifies a bead-nucleated cultured pearl, whereas concentric banding indicates non-bead cultured or natural origin. Verify the report matches the exact item by comparing weight, dimensions, photographs, and any serial numbers, and ensure the laboratory lists treatments and provides images. Perform cautious at-home checks such as feeling for a cool initial touch that warms slowly, observing overtone shifts under different lighting, inspecting drill holes for coating or resin, and lightly rubbing the pearl across the front teeth for a gritty nacre texture, then seek lab confirmation for any significant purchase.
Shop freshwater pearls with genuine nacre and sterling silver clasp

Image by Olga Guryanova on Unsplash
Assess lustre, nacre, surface, and shape
Assess lustre by holding the pearl under strong, diffuse daylight and direct light and watching for sharp, mirror-like reflections and a sense of depth. Tilt the pearl to reveal orient or subtle colour flashes; crisp reflections show stronger lustre, soft, fuzzy reflections show weaker lustre. Examine nacre with a loupe, looking at the drill hole and the pearl edge for concentric layering, beads or a visible nucleus, and any chips or thin areas that expose different layers, because visible bead outlines or gaps suggest thin or compromised nacre.
Inspect the surface under 10x magnification, count pits, scratches, and spots, and note whether blemishes interrupt reflected light or penetrate the nacre, since the size, number, and location of flaws affect durability and how the pearl presents on the skin. Evaluate shape and symmetry by rolling the pearl on a flat surface, stringing it temporarily to check for wobble, and measuring diameter at several points, with consistent outlines and repeatable reflection bands signalling better symmetry. For strands, minimal diameter variance between beads shows a closer match and more even appearance. Ask for high-resolution photos from multiple angles, a magnified view of the drill hole, and any laboratory report stating nacre thickness, nucleus type, and treatments, and if uncertainty remains, organise an independent gemological assessment.
Choose a matched freshwater grey strand for lustre and symmetry.

Image by Paula Bustillos on Unsplash
Confirm authenticity, disclose treatments, and verify certification
Ask for an independent gemological report and read it for explicit statements about natural or cultured origin, presence or absence of a bead nucleus, species or farm of origin, any treatments noted, nacre thickness measurements, and high-resolution images or X-ray results signed by a qualified gemologist. Inspect the pearls yourself or request ten times magnified photographs showing drill holes, the pearl surface, and stringing, and look for concentric growth lines or a visible bead core at the drill hole, consistent lustre and overtone across the strand, matched shapes and sizes, and neat knots between pearls. Use simple, non-destructive home checks such as a gentle tooth rub to feel a slight gritty texture, and note how the pearl holds coolness and its relative weight, while treating these observations as preliminary.
Require full disclosure of treatments and corroborate seller claims with telltale signs: dye often pools or shows stronger colour at drill holes, coatings can appear as an unnatural film or rub off slightly on a soft, lint-free cloth, and unusually uniform colour or mirror-like shine can indicate bleaching, dyeing, or coating rather than natural variation. For conclusive results, arrange laboratory X-ray or other non-destructive testing and insist reports include nacre thickness measurements and signed imagery. Verify seller transparency and after-sale protections by requesting written provenance, a clear authenticity statement, documented treatment disclosures, a return policy that allows independent testing, and traceable communication. If a seller will not provide documentation or access to independent testing, seek another source.
Genuine freshwater pearl bracelet, inspectable nacre and finish

Image by cottonbro studio on Pexels
Inspect settings, materials, and construction for durability and wear
Request independent documentation, such as a laboratory report or appraisal, and verify visually by examining magnified drill-hole images or, where available, X-ray or cross-section evidence to reveal a bead nucleus or concentric growth lines that distinguish natural from cultured pearls. Tilt each pearl under diffuse light to assess lustre and orient, noting that sharp, mirror-like reflections indicate thicker nacre, while chalky, blurred, or pitted areas suggest wear, dye, or thin nacre. Use a 10x loupe to record blemishes such as flakes or pits that could worsen with wear, and inspect drill holes closely for exposed nucleus or inadequate nacre.
Inspect drill holes, stringing, and knots by checking that drill holes are clean and centred, that silk or thread shows no fraying or stretch, and that knots sit between pearls where appropriate. Gently flex a strand to test tension, and ask whether it has been professionally restrung and knotted to reduce the risk of loss if it breaks. Examine settings under a loupe for loose prongs, visible glue, thin solder seams, or movement when a set pearl is pressed, because these concrete signs indicate where loss or damage might begin. Verify metal hallmarks to confirm solid precious metal rather than plating, note contact points where metal rubs the pearls, and ask how the piece should be cleaned, re-tipped, or professionally serviced to organise future maintenance.
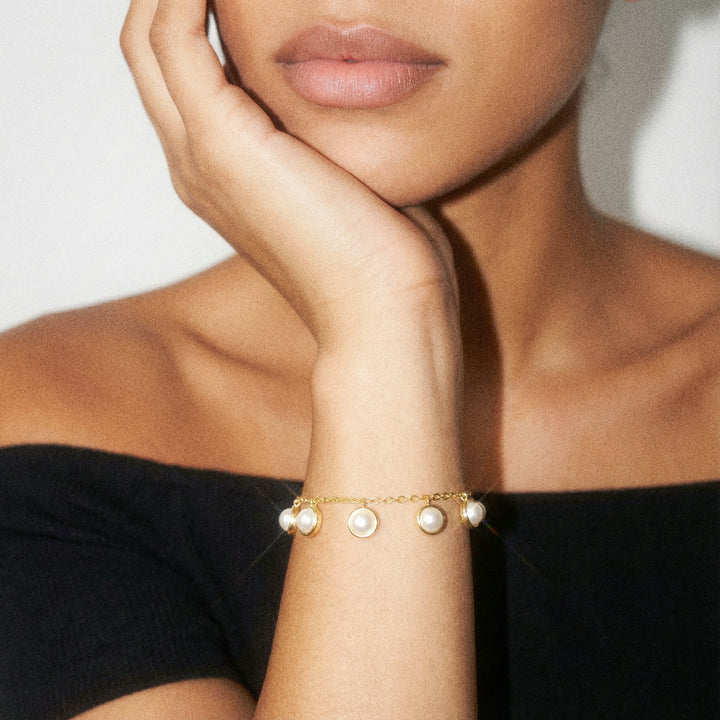
Inspect this AAA freshwater pearl bracelet with hallmarked 925 clasp

Image by Sam Lion on Pexels
Verify seller credibility, protections, and post-purchase support
Before you buy, request an independent gemmological certificate and check the report number against the issuing laboratory's database to confirm the tests used, such as X ray, microscopic analysis, or spectroscopy. An X ray that reveals a bead nucleus supports a bead cultured origin, while layered nacre without a nucleus points to non-bead cultured or natural formation. Also require written provenance and item specifics, including species, cultivation method, country of origin, size, shape, nacre thickness, and any treatments, and ask for batch photos that match serial numbers and hallmarks on clasps.
Insist on high-resolution photos and a short video that show surface texture, drill holes, and how the strand moves, because magnified images revealing concentric growth lines, surface pitting, or orient give tangible clues to nacre quality. Confirm seller credibility by checking verifiable trade affiliations, consistent third party reviews across multiple platforms, and clear, written policies for returns, repairs, insurance, and dispute resolution. Plan for an independent, non-destructive inspection after purchase, such as refractometry, microscopy, or imaging by a local gemmologist, and request that the seller supports an independent appraisal if authenticity is disputed. Keep all certificates, test results, and correspondence to substantiate any future claims, and avoid destructive testing that would alter the pearl.
Pearl value and longevity depend on hidden factors such as nacre thickness, nucleus type, surface condition, and the quality of settings, so visual appeal alone is insufficient. Ask for sharp, mirror-like reflections under diffuse light, magnified drill-hole images, and an independent gemmological report that includes X-ray imagery and nacre thickness measurements to reveal the details that determine appearance and durability.
Inspect settings with a loupe, check knots and hallmarks, and require full disclosure of treatments, provenance, and return terms so you can organise appropriate care. Keep certificates, high-resolution photos, and all correspondence, and arrange an independent assessment if anything is unclear to protect your purchase and confidence.